GCP Private Service Connect
This page describes the setup process for Private Service Connect, a Google service that securely connects a Virtual Private Cloud (VPC) to Google APIs without creating an external IP address. You need a GCP account to use this feature.
GCP General Workflow
-
Begin creating a paid-tier cluster in a region that supports private access.
-
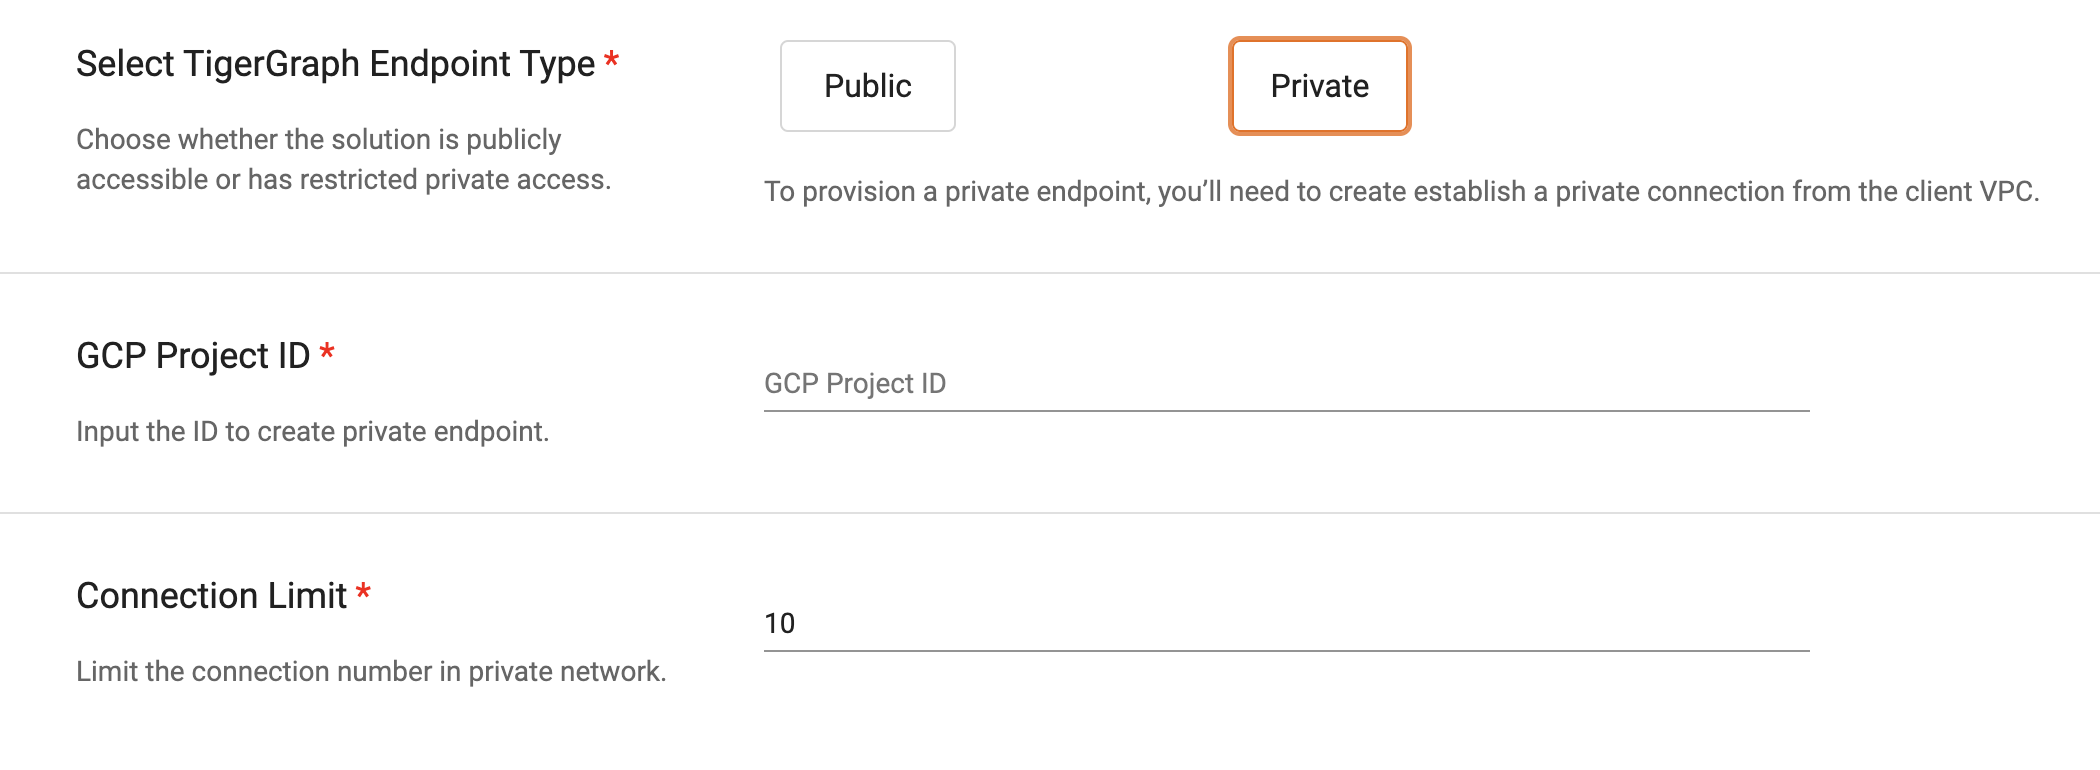
Select “Private“ for the TigerGraph Endpoint Type.
-
Fill in your GCP Project ID and define a connection limit. Behind the scenes, TigerGraph will provision a Private Service Connect service and provide you with a Service Attachment name.
-
In the GCP portal, create a Private Service Connect endpoint using the service name above.
-
Confirm on the TGCloud Portal that the endpoint has been created and TigerGraph will automatically approve it.
Instructions
Create a connection with the GCP web interface
Google has a detailed page about using Private Service Connect at this link: Create a Private Service Connect Endpoint
-
Verify that a subnet with Purpose “None“ exists to contain the Private Service Connect endpoint.
-
The subnetwork region must be the same as TigerGraph’s cloud. You can reuse an existing subnetwork.
-
-
In the Google Cloud web interface, go to Private Service Connect.
-
Go to the Connected endpoints tab and click Connect endpoint.
-
For Target, select Published service.
-
For Target service, enter the service attachment URI from the TigerGraph Cloud Portal.
-
The service attachment URI is in this format:
projects/SERVICE_PROJECT/regions/REGION/serviceAttachments/SERVICE_NAME
-
-
Enter a name to use for the endpoint under Endpoint name
-
Select a Network for the endpoint. This is the endpoint that connects to the TigerGraph cluster.
-
Select a Subnetwork for the endpoint from step 1.
-
Select an IP address for the endpoint. If you need a new IP address, you can create one:
-
Select Create IP address from the IP address drop-down menu
-
Enter a Name and optional Description for the IP address.
-
For Static IP address, select either Assign automatically or enter your own with Let me choose.
-
Click Reserve to finish the IP address setup.
-
-
Click Add endpoint to complete the process.
Private DNS via GCP console
Create a Private DNS Zone named privatelink.i.tgcloud.io on the Cloud DNS page.
In the new DNS zone, add a DNS A record with the same name as the cluster domain from the TigerGraph Cloud Portal. The value is the private static IP address for Private Service Connect.
Do not add privatelink.tgcloud.io to the DNS A record.
|
Create a connection via CLI
Make sure you have the latest GCP CLI tools from this link: Install the gcloud CLI
Verify that a subnet with Purpose set to None exists to contain the Private Service Connect endpoint. The subnet region must be the same as TigerGraph Cloud.
You can reuse an existing subnet that you have already created using the GUI or create a new subnetwork using this command:
gcloud compute networks subnets create <subnetwork_name> --project=<customer_project> --range=<subnet_cidr_in_customer_network> --network=<customer_network> --region=<region>Create a static IP address for the Private Service Connect endpoint:
gcloud compute addresses create <static_ip_address_name> --region=<region> --subnet=<name_of_subnet_from_step_1> --addresses <ip_address_in_network_from_step_1>Add the endpoint:
gcloud compute forwarding-rules create <forwarding_rule_name> --region=<region> --network=<customer_network_name> --address=<static_ip_address_name_from_step_2> --target-service-attachment=<URI_from_TG_cloud>In the Private Service Connect GUI, wait a few minutes for approval. After approval from the system, the endpoint Status will appear as Accepted.
Private DNS via CLI
Run this command to create private DNS zone:
gcloud dns managed-zones create <zone_name> --dns-name=privatelink.tgcloud.io --networks="<customer_network>" --visibility=privateNext run this command to add a DNS A record to the DNS zone. Replace <full_domain_name> with the domain name in the TigerGraph Cloud portal.
gcloud dns record-sets create <full_domain_name> --type="A" --zone="<zone_name_from_step1>" --rrdatas="<static_ip_address_for_psc>" --ttl="300"